Showing posts with label embellishment. Show all posts

Monday, 28 March 2016

The Goodbye Cushion

The neighbours that live across the road from us are selling their family house and downsizing by moving into a smaller and more easily maintainable unit.  Consequently for the past few months they have had the arduous task of cleaning out 30 years worth of 'stuff' that is no longer needed with some items going to Lifeline, some being sold at a garage sale and a lot just thrown in the rubbish bin.  I was fortunate to be given some fiction and non-fiction books and fabric lengths but best of all a tangled mess of stranded and perle threads, ribbon embroidery threads and lace which I happily sorted one Friday night and spooled onto cards whilst watching a favourite movie on TV (mmm...that's how exciting my Friday nights are these days).  Anyhow, amongst the fabrics were cut out pieces (shown below) - some already partially embroidered and beaded - that apparently were initially meant to be made into a stuffed teddy bear for her three daughters when they were young.  With time constraints, lack of motivation and inclination over time, they were all but forgotten about until the big clean out and my neighbour (knowing that I was crafty inclined) thought I might be able to use them.  Well...was she right about that!!


However, it wasn't until I took a closer look at them that I realised the huge amount of work that had already gone into these pieces and felt that I shouldn't really be accepting this when she had done so much herself and it was then that I decided to create a goodbye gift for her.  My first thoughts when studying it was what a beautiful crazy quilted piece they would make and so I set myself the task of making them into a cushion.  

First I carefully washed the pieces individually to eliminate the musty smell of sitting in the back of a cupboard for so long before grouping the colours to work out how many pieces could be used according to their shape and embroidery keeping in mind to distribute the colours evenly for both sides.  Two pieces of calico were cut to a pre-determined size and both sides of the cushion were worked at the same time ensuring there would be an even amount of fabric pieces to cover both sides.  I was really surprised how after trimming to straighten the edges of each piece that the overall size needed to be decreased so it turned out to be a wise decision.  Where the off-cuts had beads, I kept these for use later on.


These photos show the almost completed patchwork for both sides and highlights the use of the embroidered and beaded pieces. 

Once all the patchwork was done, time was then devoted to embellishing the seams and/or any bare sections with either embroidery, beading or any other interesting form of embellishment.  My two main criteria right from the very beginning were to use as much of my neighbour's threads, beads, ribbons and lace and to also enhance her work by copying the stitches she had already used as much as possible so there wasn't a definite and obvious distinction between her work and mine.   Her use of basic stitches - herringbone, lazy daisy, feather, etc. - set a good starting point for me and these were incorporated as well as using some of my own.

After completing an intense 6-7 weeks of constantly working on the project at every possible opportunity, the cushion was bound with fabric (a piece that was given to me by her) and the insert sewn into the cushion before being slip-stitched by hand.  


One completed side of the cushion...


... and the other.

... and just a couple of close-ups.


I took the cushion to my neighbour last Wednesday and the emotional tears and impromptu grateful hug told me her true feelings of this gift.  

I will miss her and her family when they move on as she has been a wonderful friend over the almost 28 years that we have lived here.  We've had fun conversations, shared happy occasions like weddings and births of grandchildren (hers not mine), supported each other during sad times and given friendly waves to each other when in the yard watering our gardens.  I wish her and her husband much happiness and good health in the next phase of their lives.

Ros 

'Friendship and support from friends is something which is a source of tremendous inspiration always and to everyone' - Nelson Mandela


Thursday, 8 October 2015

Quilted Case Rules

On a whim a couple of weeks ago I decided to sew a quilted case for my quilting rulers to protect the corners from damage and the possibility of them being accidentally broken or cracked.  It occurred to me that it would be a great way to use up left-over fabric scraps in my stash (of which I have plenty) and a resourceful way to de-clutter.  Cleaning out the pillow-case of scraps brought back wonderful memories of garments that had been made for my daughter when she was very young and even some of my own clothes along with crafts from more recent years so this project really became a collection of memories.  

Firstly I measured a layout of the size and shape that would be needed onto brown paper and then set about blending and sewing the fabrics so the plain and floral colours would be evenly distributed. This was painstakingly done row by row and also in accordance with how much fabric was available for each colour.  The length of each strip in each row was staggered for a brick-like effect.  


But, of course, once the strips were sewn together, the embroiderer in me realised that it could do with a 'bit' of texture and interest here and there which, of course then led to perhaps a 'bit of bling' here and there which then led to filling each plain coloured fabric strip with some form of embroidery and/or beading or sequins.  I'll admit it, I confess ... I was obsessed ... but you see once I had started and could see how beautiful it was looking with just simple embroidery stitches ... alas, I could not stop.


By incorporating simple embroidery stitches of chain, stem, lazy daisy, star, straight, feather, blanket and french knots together with brightly coloured sequins, bugle, seed and pearl beads, it created an incredibly interesting work of art.  Because there was so much bright colour in the fabrics, I decided to only use white stranded cotton and thicker crochet cotton for contrast.  You can see by the above photograph that the edges of the strips were all of a slightly different length but would be neatly cut to the measured size as seen in the photograph below after it had been quilted with contrast fabric and wadding.  I decided to just quilt along the seam of the long strips and not the shorter seams of each strip as I felt this gave enough of an effect without becoming too tedious.


Once this stage had been reached, the blue binding was sewn and slip-stitched into place across the longer top edge before then folding the entire case into shape.


Once this was done blue binding was then sewn and slip stitched into place from the lower folded section through all thickness of front and back, around the overflap and back down the other side.


 A couple of press studs were then hand stitched on the flap and front of the case to ensure the rulers don't move and/or slip out.


This is the back closed view...


and this is the back open view.  After completion, I decided to carefully add a few more sequins on the red section and another backstitched star with seed bead on the black strip as they were on the front flap and 'front and centre' of the project.

I absolutely loved working on this project.  Who would have thought that left-over scraps of fabric, a little imagination and simple embroidery could create something so useful.

Ros

'The difference between try and triumph is just a little umph' - Marvin Phillips


Monday, 11 August 2014

A Crazy Weekend

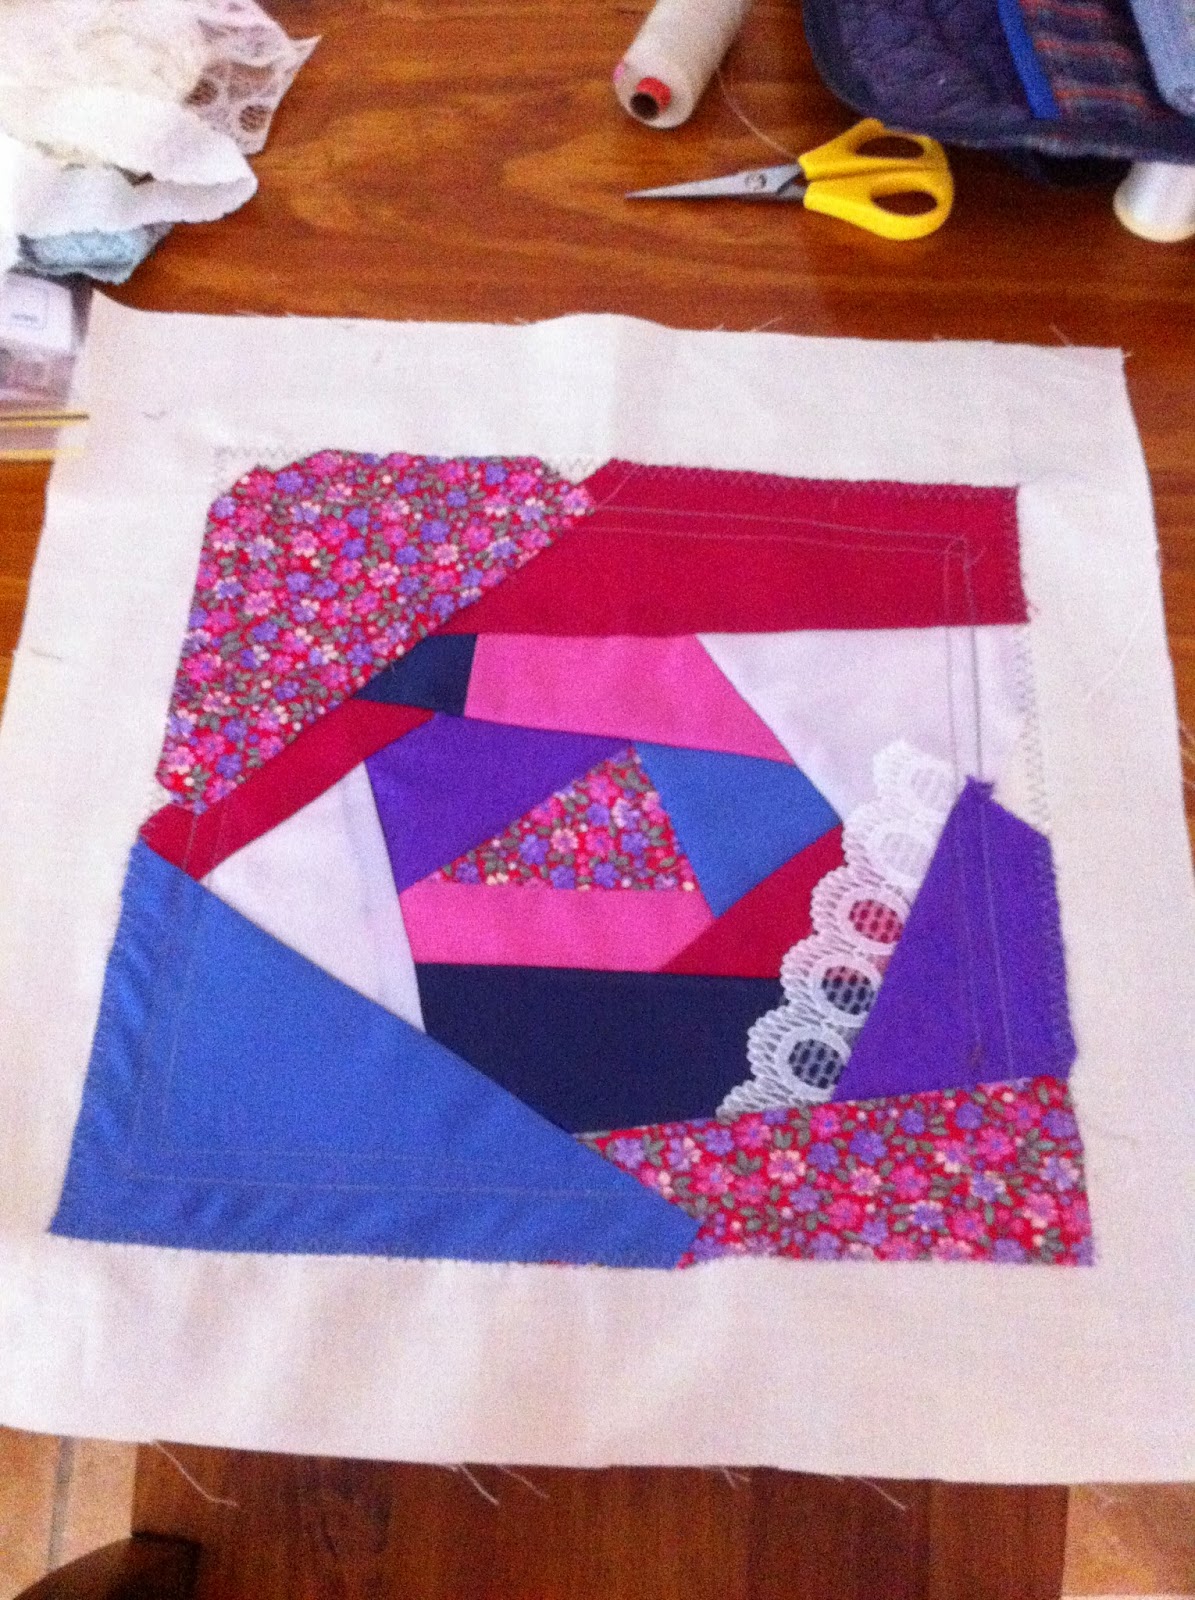
Crazy Quilting that is!!  A couple of weeks ago a few of us ladies from the Guild group decided to treat ourselves to a 3-day stitching weekend not only to 'get away' for a break but to take advantage of learning the skill of crazy quilting which one of our very clever stitchers is quite adept at.  We went armed with all our requirements of fabrics, beads, buttons, threads, laces, braiding, sequins, etc. really quite unsure of what was entailed even though we had studied our friend's work of art, but came away at the end of the weekend totally 'hooked' and inspired by what everyone else had accomplished.

On Friday night (after dinner of pizza of course) we set about machine stitching together shapes of fabric which would become our background.  


The idea is to choose a patterned fabric with at least a couple of different colours and then choose 2 or 3 colours from that and then match fabrics in a couple of different shades from those colours.  You can see by my piece that I chose pink, blue and white to work with.  Varied shapes are then cut and added to make an interesting and balanced patchwork.  You can also see that on my piece I added a strip of lace with a partial open weave for dimension showing the coloured fabric underneath. What really looks great is using different fabric textures or a single 'special' fabric to highlight and draw the eye's attention.  As this was my first practice piece I only used fabric from my stash so there was nothing really special about the fabric.  We had pre-determined the finished size and when we reached that point, machine stitched two rows of straight stitch around the edge and after trimming to size zigzagged the edges to avoid fraying.  I should add that this had all been stitched on a square of calico large enough to be placed in an embroidery hoop ready for the next exciting stage.


Now the next part is where imagination and creativity comes into play because by using all embellishments at your disposal you cover the seams however you wish.  Different threads were experimented with and stitching techniques used in association with beads and braids to give - what I think - a beautiful finish.   Let me say right now though that my crazy quilting piece is nowhere near finished as there is still a lot of work to do and it is quite time-consuming but seriously addictive.  It was so inspiring to see what ideas and techniques the other ladies had used and which could possibly be applied to our pieces of work.  The great thing about this was that everyone's work was so different and unique and I found the style and colours everyone chose to use really did reflect their individual personality.

The one thing that our friend/tutor kept telling us when we would become unsure on our next step was that with crazy quilting 'the rule is that there are no rules'.  Now that's what I call freedom.

Ros

'The roots of education are bitter, but the fruit is sweet' - Aristotle


Monday, 21 October 2013

Gift Table Crafts

Twice a year the Queensland Embroiderers' Guild open their doors to the public to profile and display the varied works of its talented members and it is requested that we all contribute a couple of stitched items for the gift table to help raise funds.  There are no restrictions on what we make as long as it consists of some form of hand stitching and for some ladies it can be an issue deciding on just how much time and effort to put into an item that will be donated.  

However, for me the dilemma is always in deciding on what type of item to stitch as there are always so many small crafty ideas that I can think of whilst at the same time trying to keep ideas fresh and modern. Unfortunately, last year I foolishly forgot to photograph the slip book covers which had been embroidered with a variety of colourful basic stitches, but which I know sold rather quickly.  This year I decided to stitch my latest love for the delightful biscornu.


It was a wonderful way to perfect the technique and as you can see I stitched a couple of different sizes on coloured aida and linen fabric with ribbon attached to the two smaller ones for use as hanging ornaments.  Small beads (from my stash) were included as embellishments either during the stitch-up process or design stage and all were finished with a bead in the centre on the front and back.  With the exception of the far right biscornu in the purple and teal colours (a little creativity on my part) which was a design from a recent book purchase, the designs for the other biscornus were from a website - Wyrdbyrd's Nest- which listed quite a range of free patterns and well worth checking out.  

It was a joy and pleasure stitching these little treasures and I can only hope that whoever purchases them from the gift table will appreciate the love that has been put into them.

Ros

'Speak in such a way that others love to listen to you.  Listen in such a way that others love to speak to you.'  -  Anonymous

Tuesday, 1 October 2013

Cushion Talk

From the outset, one of the main objectives when creating my designs has always been their practical application.  Projects on the Projects Page of my website offer ideas and with just a little imagination or tweaking, beautiful and personalised items can be stitched with that wow factor.

For some time now, I have wanted to stitch one of my designs on a cushion cover so over the last couple of weeks have experimented by using a slightly larger count of more durable open-weave linen.  One thing I would like to point out when stitching on a larger open weave fabric is that in order to obtain better coverage and depth of colour, it's probably best to use three strands of thread for the cross stitch and two strands for backstitch. With the addition of ribbon sewn diagonally across each corner the design is framed simply but elegantly. Basic finishing instructions are given on the Projects Page, but this cushion was backed with red poplin fabric and a zipper opening to enable the cushion insert to be removed and the cover to be gently hand washed should it become soiled.  Of course imagination dictates how this cushion cover could be otherwise embellished eg. buttons, beads or extra stitching around the border.


Projects like this make beautiful statements, are feature pieces and refined works of textile art and therefore, most advisedly, should be kept well out of the way of men or teenage boys who simply don't appreciate the fact that they should NOT be used for pillow fights or to put their grubby, smelly feet on!

Ros

'You can only find out by trying' - Greek Proverb